Monday, November 23, 2009

The Dust Bunnies are Multiplying Exponentially

There is a reason why my house is a mess and I haven't posted in ages. We have a new addition to the family. No, no babies. I am becoming the crazy cat lady.

I swear, I only went to PetSmart to pick up cat litter! Deceptively, they have kittens from local shelters in nearby window cubbies. I recognized one from a couple months ago. She was very needy and would rub all over the Plexiglas window if you held your hand up. After I read the description that she'd do best in a household with another active cat, I knew she'd be right for us. And roughly 15 minutes later, I was bringing home a kitten. lol


The transition had me quite worried. We separated her in another room and were slowly acclimating the other cats with her. Linus guarded the door 24/7. Lucy would just hiss. But after some time, everybody just loves each other!


Maybe now I'll finally get to hanging my dining room light fixture. (Three months after I was anxiously awaiting it to be delivered.)

Sunday, September 6, 2009

Flipping It Around

For the last year, I've debated flipping the living room with the dining room. The current layout, which is L-shaped, isn't very efficient. There's a LOT of wasted space in some areas and very tight quarters in others.

Current layout:


(Click to enlarge)

Layout via floorplanner.com.

See that space behind the loveseat? It needs to be somewhat open to access the built-in. I couldn't push the furniture against the adjoining wall due to TV placement. Overall, the current set-up was making the best use of the space. I even tried moving things around via Floorplanner and even the graph paper method.

After we had some new (smaller) living room furniture delivered last week, I decided to try the living room/dining room switch. Perfecto!


Here's a sneak peak of things to come (in its initial stages):


There's still a lot to do...
  1. Change ceiling light fixture.
  2. Purchase white coffee table, end table, and paint entertainment unit.
  3. Decor for end table and back wall.
  4. Add texture and lighten up the area via throws and rug.
No pictures of the dining room yet until I get my new dining room light. I found the perfect one for us, considering that the electrician won't be coming out any time soon. (It can be easily converted to hardwire.) So purty, isn't it?


I was unsure of entering into the house into the dining room. But it doesn't feel that way at all. And it's soooo much more open and airy with ample space to walk around. Much more entertainment-friendly!

Thursday, August 27, 2009

The Hopeless Garage Door

What do you do when the previous homeowner decides to put in this beauty of a garage door?


(from our initial walk through)

Yes, you are looking at that right. It is one of those yellow plastic rolling commercial garage doors. It was such an eyesore! To replace it would have set us back about $300. I have more important projects to spend that money on so what's a girl to do? Grab a can of paint, of course!

I thought painting it was out of the question because it was plastic and because it rolled. The light bulb came on once I realized the sections didn't actually bend. (Can you tell how often I actually go out to the workshop? lol)

I picked up a quart of enamel paint at Lowes. I took a deep breath and then just started painting. What I should have done was tested out a spot. What I should have done was tested its durability. Instead, I just went for it with this uneasy feeling that it might be peeling by next summer. No worries though! I scrubbed, scratched, and pressure washed after the first coat was up. It's not budging!


I hung the planters a little too low. (Tip, don't attach them without the planters nearby. For some reason I thought the chain was much shorter.) But overall, I LOVE LOVE LOVE it. Why have I been living with this ugly door for so long??

Some more before/afters:


I'm undecided about the side door color. I really think it would look better white but Matt pointed out how dirty it gets. Who knows how long it will stay this color. :)

Project Cost Breakdown:
Enamel paint: $10
Total: $10 Yep, that's it! Ugliness erased with only $10. If you count the paint for the entire workshop, it only set me back about $40. But that is a whole 'nother post where I cry about the scraping and sanding.

Ask and You Shall Receive

But it might take me three weeks to get to it! I've been a busy little bee around the house (lots of new posts to come) so I haven't gotten to taking a full picture of the new bedroom lamps. Finally, here they are:


(It's a dreary day so the lighting is terrible!)

So if you were undecided before, what do you think? I think they are growing on me so they are here to stay. Until a cat knocks one of them over and breaks it. I've already come home to a lamp crashed on the floor. Speaking of which, they seem to be drawn to the camera. Out of 7 shots, they were in all but 6. lol


I think I need to do a less stark white color on the "art" above the bed. Those are actually ceiling tiles, believe it or not! I purchased 5 of them for about $40 (free shipping) and gave the other two to a friend. They are perfect for above the bed due to the lightweight material. If they fall off, no one's teeth are getting knocked out in the middle of the night. But let me tell you, they WILL scare the beejebus out of you if they fall on you while sleeping. So don't just stick them on top of the headboard for the night and think you'll hang them up tomorrow. Unless you want to give yourself a heart attack! lol

Friday, August 14, 2009

Falling Out of Love in 8 Seconds Flat

I'm organized, analytical, and a planner. Everyone IRL jokes about how predictable I am. However, I can be impulsive. Really impulsive, especially with big decisions. My job, my hair (goodbye brown, hello blonde), even moving in with Matt. So far, all those decisions ended up being even better than expected. :)

I made an impulse purchase on something pretty insignificant: bedside lamp shades. Albeit, an expensive impulse buy. From a store with a sign posted, "All Sales Final". I had been eyeing a similar lamp at Target for ages:

I was picturing some drum shades with them but wasn't sure. See, I'm very lamp/lighting stupid. Then I saw a similar set up in Freckles Chick's blog and fell in love with the lamp combo and her style seen here:


Here's the bedroom so far:


(I now have three of those tiles above the bed to hang. Although they'll be lower this time. I'm just too lazy to get to it. And maybe put the duvet IN the duvet cover.)


The sales associate found a pair of shades, put them on the lamps, and I gasped. They weren't at all something that I would normally pick out. I was in love and it was unexpected. The price tag made my eyes bug out. But who cares! These are beautiful! Sign on the dotted line!


(Don't mind the cat toys. lol)

I got them home, set them up, and immediately started second guessing myself. Are they too feminine? Too frilly with the shape? The fabric too... rich? I loved the very subtle pattern. But I'm not sure if they go with the rest of the room or my style. Are they unexpected in a good way or a bad way? Let me know what you think.

Edit: I'll post a whole room view tonight. I guess I'll have to make up my bed first. ;)

Saturday, August 8, 2009

New Year's Resolution Revisited

I had this insane idea to make a ginormous to-do list as my resolution this year. There were 50+ items on that list! Fast forward to July and I knocked out maybe half a dozen items. I decided to have some friends over for Matt's upcoming 30th birthday so it was time to get my butt in gear.

Here's where things stand so far:
(Many pics to come!)

Living Room/Dining Room
1. Replace all outdated electric outlets
2. Hide the cords in the entertainment center
3. Paint the baseboard
4. Replace damaged floor boards
5. Attach quarter round almost there
6. Replacement blinds for backdoor
7. Decorate entertainment center
8. Rug to help anchor the space
9. Organize entryway closets (one for hanging items, one with shelves and baskets)
10. Paint interior of entryway closets
11. Finish painting exterior of built-in
12. Prime and paint interior of built-in (and start using it to store things!)
* Wish list: flat panel TV, new couch and chair, more grown-up coffee table

Kitchen
1. Replace GFI outlets with matching ones that I bought a year ago
2. Replace damaged floor boards
3. Attach baseboards and quarter round
4. Replace ugly fluorescent light above sink to something more modern
5. Hook up the garbage disposal that was installed nearly 18 months ago
6. Start planning for new Ikea kitchen cabinets and countertops in 2010

Laundry Room/Mud Room
1. Prepare walls for painting (sanding area where cabinets were removed)
2. Paint ceiling
3. Paint walls (same color as living room)
4. Install tile 50% there
5. Organize space for shoes, coats, hats, etc.

Hallway
1. Replace outdated electrical outlets
2. Repaint with satin finish
3. Paint baseboards
4. Hang pictures

Master Bedroom
1. Replace all outdated electric outlets
2. Repaint
3. Purchase comforter and duvet cover for new bed
4. Install closet organizer (already purchased)
5. Purchase matching lamps for nightstands
6. Paint doors and baseboards

2nd Bedroom
1. Replace all outdated electric outlets and light switch
2. Install new carpet Installed tomorrow!!
3. Remove 50% of items and give to Goodwill
4. Install shelves (already purchased)
5. Paint doors and baseboards
6. Prime and paint interior of closet
7. Find a better way to hide litter box
* Wish list: Bed for guests (Hmm, guess I'd have to move the litter box then!)

3rd Bedroom (a.k.a. Man Room)
1. Decor for walls
2. Paint baseboards and doors
3. Give 75% of stored items in closet to Goodwill
4. Paint interior of closet

Bathroom
1. Finish flooring in linen closet
2. Paint walls
3. Recaulk tub

Exterior
1. Plant grass in bare spots
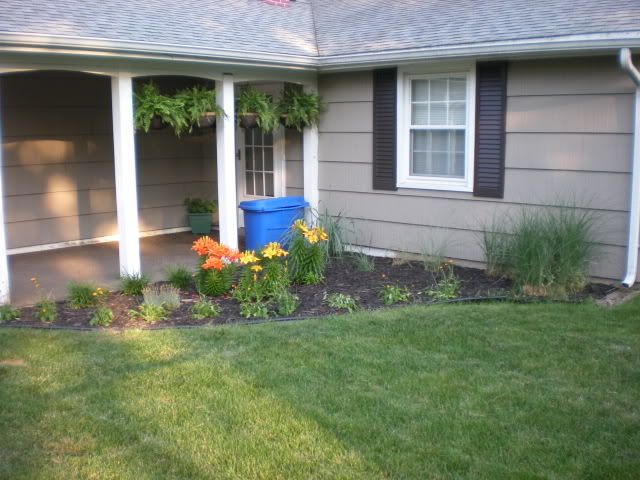
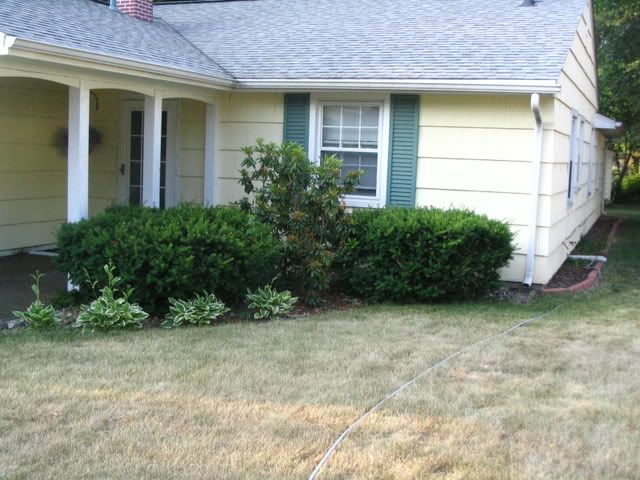
2. Add additional ornamental grass to front yard
3. Plant ground cover on side of house 50% there, but planting hosta instead
4. Finish weeding and mulching retaining wall
5. Clear overgrown weeds from back fence
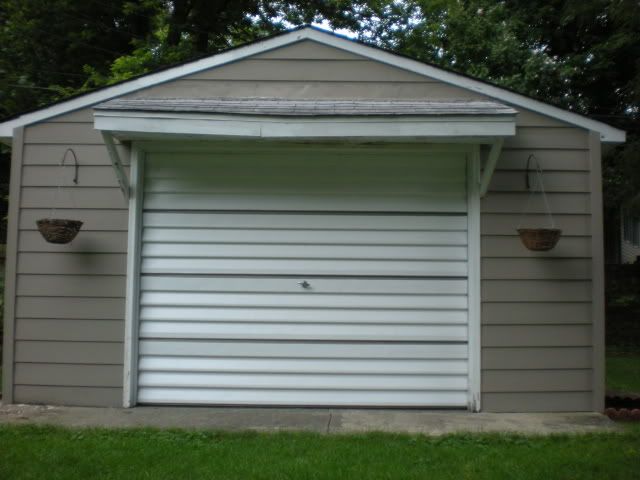
6. Dispose of the ginormous tub of river rock
7. Paint exterior of workshop 50% there
8. Scrape and paint all trim
9. Replace both water spickets 50% there

Yowzers. I can't believe I've gotten all of that done! Of course, I could have done it without my sidekick: coffee. Eh, and maybe Matt. :)

Saturday, July 25, 2009

My Very Own Hell's Kitchen

I FINALLY have kitchen floors! Let's throw a party! Actually, we will be having one next month because I'm so happy that my house is finally presentable enough to have company over. Why wasn't it presentable before?

Original peel-and-stick tile (and PINK paint from the previous owner):


Looks decent in the photo but awful in person. Dirty was caked in the crevices and the tile was blech. To match the lovely border, I suppose.

The new floor:


(Wall color is Dutchboy's Roasted Tomato)

Then the ice maker leaked and wasn't discovered until two days later. I lived with the concrete floor for too long as we worked on other projects. And thank goodness we didn't replace right away because the water heater leaked a couple months later and would have ruined it again.


The kitchen was finished Thursday night. I walked into the kitchen about 8 times yesterday and giggled every time. lol It makes the room look so much more airy! It feels twice as large.


I still need to add baseboards but it looks pretty good so far doesn't it? :)

Project Cost Breakdown:
Paint and supplies: $40 (WalMart's Color Place and tinted gray primer)
Light fixture: $40
Light switches: $12
Floors: $76 (Ikea's Tundra laminate in maple)
Total cost: $168

The next step is to replace the kitchen cabinets. The existing ones aren't very functional and they are OLD. Original to the house so that makes them 60+ years old! I've been eyeing the Ikea ones in Adel White.


The only great thing about having such a small kitchen is that it's not that expensive to replace the cabinets!

Wednesday, July 22, 2009

When Big Projects have Little Visual Payoff

It's an awful feeling when you slave away for 2 full days and have very little to show for your work. :( I've mentioned before that we had some water damage to our floors a while back. The laminate started to separate at the seams. Most cracks were the width of a penny.

We've made a lot of progress but the change isn't huge. It's not like when we went from pink carpet and walls to laminate and warm taupe walls:


Two days later, we're about 75 percent done. We just have to do the two entryway closets, a small portion of the dining room, and the kitchen. My knees are bruised, the tendons in my wrists kill, and my hamstrings are so tight! Oh, and I have a couple oddball cuts and dings. (I'm a klutz!)

In the thick of it:


I've had to be super organized when we pulled up the flooring. (While it might not look like it from the above pic! lol) Most of the boards weren't damaged. The ones that were just happened to be in the MIDDLE of the room so everything had to be pulled up. I marked which boards to toss, which ones could be reused if the end was cut off, etc.


See those cracks?!


I marked the underside of the good boards with numbers so we could lay them back down in the same order. It was all about efficiency and reusing what we could. Matt thought I was crazy! But I'll have more than half of the 10 boxes leftover.

I even marked the quarter round (which we had never gotten to installing) so I'd know which room and area the pieces belonged when we put it back together. I have no idea what EW stands for though! lol Entryway? Or East-West and I forgot to mark the room??


Our disarray of a living room as we had to move everything from one side to the other:


(At least I was able to coral those cords nice and neat while they were exposed.)

There are no "after" pics because, well, it photographs exactly the same. lol But it will be nice to have a real kitchen floor instead of a concrete one!

Thursday, June 25, 2009

57 bags of top soil, 7 gallons of paint, and an aching back.

Before:


(The deceiving picture from the online listing that I mentioned earlier.)

This is what we saw in our walk-through:


This is what we were working with come spring/summer:


Overgrown shrubs, dead grass, a sad faded yellow paint color, and a floral mailbox. It was depressing. But now, not so much. :)


Please ignore the big blue tub. It houses all the river rock that I'm still pulling up and eventually delivering to my friend's fire pit. There is still a lot to do: scrape and paint trim, fill in the bare areas, finish transplanting the rest of the hosta to the side of the house, new edging... The list is never-ending.

As an overeager homeowner, I:

1. Painted. Yep, the ENTIRE house, by MYSELF. Olympic's Stone Grey for the house color and Phantom Mist for the shutters. It looks black on the paint chip but is a wonderfully rich espresso brown. All for about $150. Yes, you heard that right. $150!

2. Ripped out the shrubs. With the help of a generous friend. Who am I kidding? I didn't "help"at at. She was wielding that ax just fine. If it was left for me to do, those shrubs might still be there today. (I'm paying her back in the form of river rock.)


3. Dug up a ton, literally, of river rock. Replaced with black mulch.

4. Slowly added new plants. Last summer, I was about 25%.


I think I'm about 50% this summer. Hopefully next year, I'll find exactly what I need to fill in the rest of the area.


5. Decorated with some hanging baskets. My $5 Boston ferns and $5 hanging baskets from WalMart. $40 for all of this. Can you believe it?


Another quick before and after:


6. My favorite part was fixing that grass for under a hundred bucks. 57 bags of top soil, fertilizer, and a bag of grass seed later:


7. I was glad once we got rid of the ugly mailbox. We had a little giggle when Matt pulled it out of the ground. We replaced it with a basic black house-mounted one. (One that I hung a bit too tall. I don't think my mail carrier can close it. I didn't think about the fact not everyone is 5'9". lol)


8. You can't see the house numbers because I removed them from the pics, but they are of the floating numbers sort. Similar to:


I think that's about it. lol This totally inspired me to break out the "listing" pics of the house and compare them to the "now" pics. Look for more blog posts to come!

The Eerie Similarities of...

Online dating and online house hunting:

Many of our friends know that Matt and I met on a online dating website. At the time, I just finished with school and was incredibly shy. (I've now done a complete 180 thanks to my job!) I had a really hard time meeting people and online made it very easy. It was like window shopping for a man. lol It was mostly entertainment and not anything I took seriously. Until I met Matt. :)

However, online dating taught me a few things:

1. Pictures can be deceiving. Just a headshot may be hiding his special wolf t-shirt.

2. Profiles can be deceiving. "I like to kick back and enjoy myself" translates to "I drink beer until I'm stupid and puking everywhere. Then you can clean it up."

3. Go with your gut. If you have a bad feeling, your instincts are kicking in for a reason.

4. Give people a chance. On paper, someone may not seem to be your type but you may be surprised once you get to know them.

When we started house hunting online, I was amazed at the similarities it had with online dating.

1. Deceiving pictures? Check! Isn't it amazing how awful neighboring houses are carefully cropped out of pictures? Rooms can look beautiful online... only to discover the work is shoddy and a bit scary.

2. Deceiving descriptions? Check! "Cute little dollhouse" means that only DOLLS will fit inside the house.

3. Go with your gut. There were a few houses that we didn't spend more than 15 seconds in. I just had a baaaaaad feeling. Like the one that smelled a bit funny. A bit funny like they were hiding a huge water/mold problem.

4. Don't prejudice yourself. The house we ended up buying? I almost refused to look at. lol I'm glad that Matt convinced me. I had a gazillion reasons why I didn't want to, but the second I walked through the door, I just knew. It had good bones. It felt like "home". And the cosmetic work it needed? Not an iota of a deterrent.

Stay tuned for some of those deceiving pictures, the "real" pictures of the walk-through, and some "afters"!

Saturday, May 16, 2009

Guess what? MORE Drawer Organizing!!

This time, I'll show you my other addiction. (That is, the one besides organizing.) It's makeup. I'm a makeup whore. I don't wear a lot on a daily basis but I like having options and I like to play around with it.

Having so much of it, though, slows me down in the mornings because I can't find what I'm looking for. A small container with plastic drawers is what works for me. I picked it up at Target or WalMart for about $5. It's about 6" x 7" x 8".

I organize the drawers in order of how I apply my makeup. Concealer, foundation, powders, and primers in the first drawer. By the way, those little sample containers that you get at Sephora are GREAT for repurposing. I use Dr. Brandt's Pores No More (amazing stuff!!) on a daily basis and touch up late afternoon. The stuff is so expensive that I won't buy two tubes. I keep the original container in my purse and this little pot at home. (Not vice versa because I don't want to be dipping dirty fingers in the pot and contaminating the product. I can be assured I have clean hands at home. A little harder at work.)


The next drawer stores my eyeshadows. They are small pots so I used a leftover container that fits perfectly in the drawer. You could probably also use a shelf liner to prevent the sliding around. What I hate about Bare Escentuals is that you can't tell what color you are grabbing. If you store them upside down, viola! Unfortunately, if you do that, the loose powder will fall through the sifter and make a mess. My solution is to not remove the inside sticker after you purchase the product. Take something sharp (and sterilized) and poke a couple holes through the sticker. Only a small amount will now come through the sifter.


The final drawer stores the items that I apply last.


I used to store my brushes in the appropriate drawers until my collection started growing a little too much. I had to find an alternative. I really like my brush roll from Sonia Kashuk. I bought mine at Target on clearance for about $7. They still have it in other patterns for about $12.00. This is essential if you have a lot of brushes.


If you only have a few, this piece is good for organizing your makeup and brushes. It's pretty efficient if you don't have a huge arsenal.


I swear I don't wear ALL that makeup on a daily basis. In fact, I went to the MAC counter today for some new eyeshadows. I asked for a "day" look. I ended up with what I consider an "evening" look. lol