Showing posts with label How-To. Show all posts

Sunday, November 14, 2010

Caulk, Caulk, and More Caulk

Let's just gloss over the fact that I haven't posted in 11 months, why don't we? I can't promise I'll return to churning out regular blog posts, but there is so much to update. I've painted the living room, dining room, built-in bookcase, and kitchen... then painted the kitchen back to the original color. I've purchased a new coffee table and entertainment center, an under-the cabinet microwave oven for my tiny kitchen, super-duper organized my built-in and closets, painted a fairly gross bedroom room closet, and started overhauling the mudroom.

However, today I did what I've been putting off for three years: caulking. The two big containers of kitchen/bathroom caulk and window/trim caulk have been mocking me for months. I'm not sure what got into me today but I worked for about 7 hours straight. (I work slow, ok?)

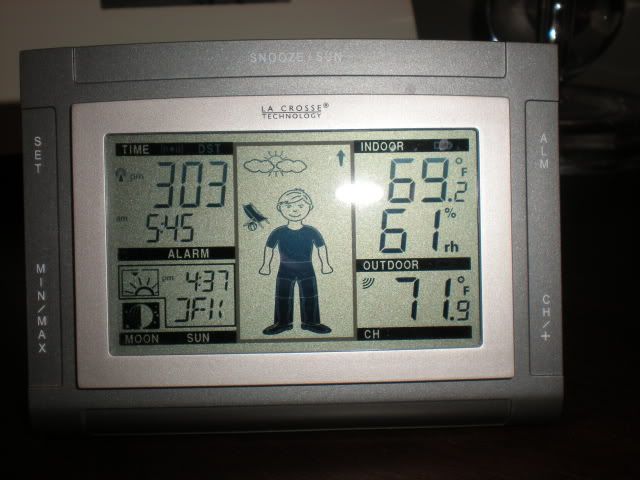
During the winter, the master bedroom is about 5-7 degrees cooler than the rest of the house. We have gas hot water heat. (The pipes are in the slab flooring.) Wonderful heat system except that the valve to the master bedroom is turned half-way off. During the last boiler servicing, I asked for the technician to turn it on 100%. The valve wouldn't budge. We have new windows so I figured the room was as warm as it would get. When I held my hand near the trim today, I felt a LOT of cold air. Not good.


I like to tape off to make the application easier. But I'm really disliking the Frog Tape. It would NOT stick to the walls. It was really strange. It worked when I bought it 6 months ago. It's not like I stored it in a hot or cold location. Three windows down and we'll see if the temp discrepancy keeps more at the 2 degree mark rather than 7 degrees! (The "outside" thermometer is keep in the living room.)


After I finished in the bedroom, I dragged my feet to the bathroom. The outside bottom of the tub gets so gross! I can scrub but it never gets clean!

I'm sure there was a better way to do it but I pulled up the old caulk with needle-nose pliers. Then scraped with a tool that looks similar to a flat-head screw driver. It will gouge the shower tiles but thankfully not the flooring tiles.


After vacuuming, I taped the area off.


I applied the caulk and here's my special secret to smoothing out the caulk: my fingers. Dip your finger in water and drag across the caulk. Wipe off the excess on your finger onto a paper towel. After finishing the area, remove the tape immediately.


Do not use this tool:


I had it and never liked it. I don't know why I didn't toss it. It makes it worse than if I hadn't done anything.


It takes a while for me to get the hang of getting it smooth.


But when I do, it gets better.

See, MUCH better!


(I realize my camera isn't the best quality. But trust me, I'm no longer embarrassed if guests see this.)

Since I had the caulk out, I figured it was time to tackle the bathroom sink. I would bleach the heck out of this any time I was expecting company. For three YEARS! Why didn't I do this sooner?


See how gray and nasty it gets? (I am really embarrassed by this.) Don't mind the ick around the faucet. I have no idea what causes this. I can use a Magic Eraser and Bar Keeper's Friend (the sure-fire combo) and it still won't budge. Eventually the caulk scraper removed it.


I taped around the sink. That was easy. A little tricky behind the sink but nothing a bunch of 1-inch long pieces of tape wouldn't solve. I couldn't tape on the countertop and keep the line even.


I decided to just apply a very thin line of caulk and hope for the best. It worked. I barely had any excess to wipe off. Then I carefully wiped around the sink with a paper towel. Viola!


I hope this helps someone that may be putting off caulking because it seems a little overwhelming. It really is fairly easy for beginners and it an important step in keeping bathrooms mold-free and your house more energy-efficient. Now I'll kick back with a beer and watch tonight's Boardwalk Empire. :)

P.S. Anyone have any tips for regrouting? The floor tile desperately needs it and I have no experience with it.

Wednesday, November 12, 2008

I'm Betting Only 0.35% Finish Reading This

I've noticed that a portion of my blog hits are actually coming from Google searches, like "How To Hang an Ikea Malma Mirror." I knew I wasn't the only one that couldn't figure that out! lol I'm probably going to lose some of you at this point because this particular post is very specific. So unless you plan on installing Ikea's Tundra laminate flooring soon, you don't need to bore yourself by reading any further. I promise I'll return to the house renovation posts soon. (And probably some more organizational posts too. I can't stop. It's a sickness.)

Now for those of you needing some tips on the installation process of the Tundra flooring, this is for you, especially after that super-duper sale on the flooring from last month!


We choose Ikea's Tundra flooring because overall it’s a great product for the price. Very durable! It wasn’t in my budget to do Pergo. I think Pergo is a slightly superior product (in density and installation) but if you are looking to save money, this is the next best thing! The other products in this price-range looked… cheap. First of all, we had some help in our installation. My brother (a former Lowes flooring manager) and BIL (who does floors for a living) helped us start. If you don’t know someone that’s done this before, don’t worry! Take one of those free laminate flooring classes that Lowes/Home Depot runs. We learned lots from it and got some actual hands-on time in the class.


Tools:

1. The spacer/taping block/metal thing tool kit that Ikea sells.
2. I don’t know much about saws but you’ll need a saw that will cut the boards the long-way and the short-way.
3. A hammer
4. Knee pads like what volleyball players wear. Trust me, your knees will thank you!
5. An old dense paintbrush (to wipe off the dust in the lip before you click and lock)
6. A little hand saw specifically for cutting under door frames


Underlayment:

I don’t think you have to buy Ikea’s brand. You can pick up other brands at a home improvement store. Just don’t buy Ikea’s cardboard-like product. Not good if you have any water issues like we did! Most underlayment is plastic. It’s also usually a moisture-barrier (a MUST if you are installing on a slab) and helps quiet the sound. Check the packaging to make sure about the moisture-barrier. As you lay the sheeting out, you’ll need to tape the seams with special underlayment tape which is available at any home improvement store.


The product itself:
When you buy the flooring, leave it in the boxes. Put it in the room where they will be installed. They need to acclimate in the box in the room for at least 48 hours. If you don’t have central a/c and can install in summer, I’d do it because humidity makes it expand.

Each box has nine boards. While all the boards are the same exact size, they don’t all have the same exact pattern. (Meaning the wood grain look to the board.) If you install them willy-nilly, it looks fine. But it looks fabulous if you install them in the right order because then all the boards look continuous and the seams aren’t as visible. I think there are three patterns. As you open the boxes, you’ll want to separate the each pattern into it’s own pile. Figure out which pattern matches the next pattern. Then install board 1, then 2, then 3, then 1, etc. Hopefully that makes sense! It can get a little tricky because the pattern was a bit puzzling if I remember correctly. It was like 1, 2, 3, 2, 3. It took us a few minutes to figure out something that seemed really simple. lol

Figure out how you want to run the boards. North to south? East to west? Some things to keep in mind… sunlight. Depending on which way you run it, it can make the seams appear more noticeable. i.e. Our boards run north-south. Our sunlight is mainly southern sun so you see the seams a bit more in the light. (Not really noticeable, IMO.) They “say” that I should have installed it east-west. But my hallway, entryway, and galley kitchen all run north-south and it looks much better when the flooring is run in the same direction.


General installation: Lowes/HD can probably tell you much better than I can. But just some things I remember... The spacers are important because the laminate will expand in hot weather. The spacers help accommodate for this. There will be a gap between your baseboards and the flooring. Purchase some quarter-round and attach it to the baseboard after you install the flooring. My suggestion: paint the quarter-round the same color as your trim. I’ve seen it the same color as the flooring and it just doesn’t look as sharp.

The click-and-lock is pretty easy. Before you actually do that part, I use an old paint brush to dust off the lips of the boards because the grit can prevent the boards from being seamless if you don’t. This is the one very apparent downside to Ikea’s quality. It’s almost like there are little jagged cardboard pieces in there sometimes.

Watch Ikea’s online video regarding the actual installation or youtube it (since their video is a bit of a joke with cartoon characters and no sound. lol But you’ll get the picture.) It shows how to start, how to overlap each row’s seams, etc. The first row you lay is easy because you are only clicking them on the sides. The subsequent rows are a bit more tricky because you are clicking them on the top and sides.

Let’s say you are working on row 2:

Lay down the first board in row 2, click-and-locking it to the board above it. Wiggle the board into place at the top. Make sure it’s seamless all the way across. Sometimes you REALLY have to wiggle it and press into it. Once you lay down the board, the seam disappears if you did it right.

Put the next board close to the previous board but give it a tiny bit of space on the left/right side (depending which direction you are going). Push it into place with the board above it. Then take the plastic tapper and lay it on the side of the board. Tap the block with a hammer until it “clicks” into place with the board on the left/right side. Be careful where you place the tapper. There’s a bit of a ledge you need to lay it on. If I wasn’t careful and didn’t put it on the ledge, I’d break the edge of the board. Very frustrating! But once I figured that out, it was smooth sailing! The metal thingy included in the kit comes into play when you get to the edge of a row because the tapper obviously won’t fit between the board and the wall.

Continue this process until finished. And viola! You have a great looking floor for a great price.

Sunday, October 26, 2008

Battle of who is Smarter: Meg or the Mirror

The contenders:

Ikea Malma mirrors:


Meg:


I just bought 12 of these mirrors for my entryway. I already have a mirror in my entryway but it just doesn't look finished.


In addition, when the front door is opened, it hits one of the sconces and keeps marring the freshly painted door. So I bought these iron scroll-y things for $3 each on clearance at Target. Blech.


I thought that adding a frame around the mirror would snaz it up. Until I put this ginormous 6 foot thing in my living room.


It's only a few feet away from the entryway. I think two big mirrors make me look a little vain. But in all honesty, it's a decor trick to bounce some light in this dark area. $36 is a lot cheaper than a new front door with some glass inserts. (That will come. Just not in the budget right now.)

But sadly, these Malma mirrors have been sitting on the floor for 3 weeks now because I couldn't figure out how to hang them. Like in traditional Ikea style, there weren't any instructions. (I would have even settled for their picture-only instructions.) Google wasn't helping except to reassure me that I'm not the only one in this quandary.


There were two small hooks and a short piece of string included. Huh? I finally realized you need to screw the hooks into the back and run the string through the hooks a few times. But if I screwed them into the back, the mirror won't lay flush on the wall. Now, I love me a tilted mirror ( a common restaurant decor trick.) But it wouldn't look right with two rows of tilted mirrors.


On top of that, I'd have to screw in 24 of these hooks. (Did I mention I'm lazy?) There were no pre-drilled holes. I'm not that ambitious. But necessity (or laziness) is the mother of invention. I found these 3M picture hanging strips from their Command Adhesive line.


What do you think?


I may add some hooks for coats underneath the mirrors at a later time. Not necessarily for my coats (because it's visual clutter to me and my OCD tendencies). But while I have 2(!) hall closets across from these mirrors, they are currently serving as storage. Not something I'd want my guests to see.

Saturday, October 4, 2008

Move Over Mr. Gallon of Paint

You've been replaced... 'cause spray paint is my new best friend! For those of you on a tight budget (or just want to save some cash), welcome to the amazing wonders of spray paint.

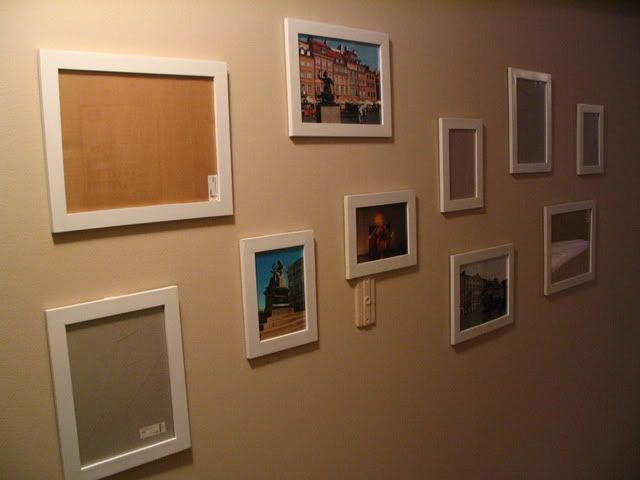
First project: I bought some unfinished frames from Ikea. Super cheap but not the style I needed.


I painted them bright white and printed out some pictures from my trip to Poland. Love it! (Sorry some of the frames are empty. I have to reorder a few of the pics.)


Project cost breakdown:
Frames $23.90
Spray paint $3.98
Photos $11.63
Total: $39.51

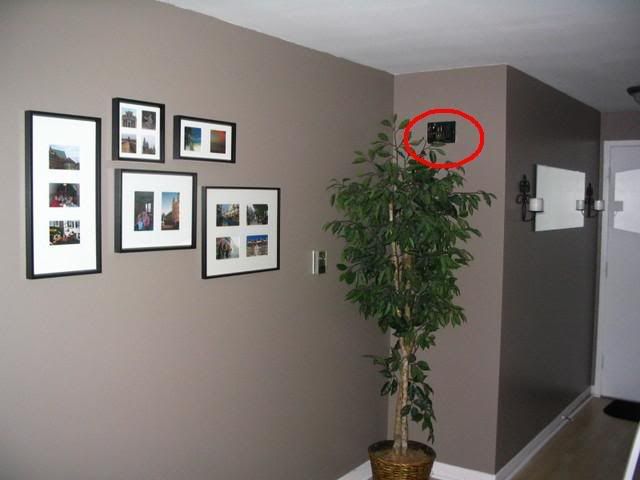
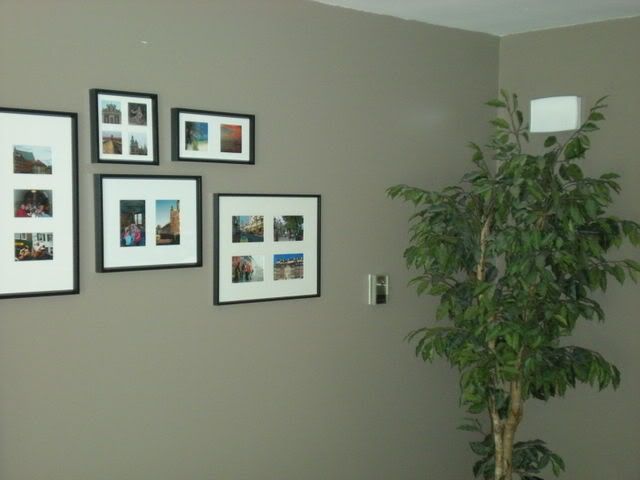
On my way out to the garage to spray paint the frames, I spied the door bell cover I tossed aside 18 months ago when I painted the living room.


I never put it back on because it was such an ugly color and outdated. Besides, an uncovered door bell fixture looks so classy.


Do you know how difficult it is just to buy a replacement cover? Especially when you don't need an entirely new system?


Project cost breakdown:
Door bell cover: $0
Leftover spray paint: $0
Total: $My favorite kind of makeover!

Today's lesson: never shop for home decor and be disappointed when you find a great deal but it's the wrong color. Spray paint is cheap, easy, and quick. (I'll break the legs of anyone who says the same applies to me!) The variety is endless: flat finish, satin, gloss, semi-gloss. You also have surface specific paint: wood, plastic, metal, even appliances! So get going!