Saturday, December 27, 2008

Back in the Saddle Again

I've stopped watching BBC's You Are What You Eat and resumed watching TLC's Property Ladder. The motivation has returned! Part of Matty's Christmas present was to surprise him with installation of carpet in the 3rd bedroom. (Long story on why it was sitting rolled up in the 2nd bedroom for many months.) I spent the 23rd repainting the room and the morning of the 24th getting the carpet installed while Matt was at work.

Orginal room with yellow walls and blue carpet:


Repainted with Matt's choice of green (that I hated):


And finally, the new gray paint that flows with the rest of the house and new carpet:


When Matt arrived home, I shut the door and told him to check out the "finishing touches" that I made to room after painting. We joked that I hung up some new decor, specifically kitty posters ordered from Scholastic. He opened the door and was shocked. He loved it!

We'll still need to decorate in here but that's another battle. lol I'd like something modern/contemporary and Matt wants something with cars or aeroplanes. I think a nice compromise is if I can find pictures of what he likes but in black/white and mat it in contemporary frames.

Project cost breakdown:
Flooring: $350
Paint: $14
Light switches/outlets: $7
Light fixtures: $20
Total: $391

Monday, December 22, 2008

My Christmas Eve House Project

Part of the reason I haven't made an entry in so long is because my camera is broke. (An unfortunate circumstance of clumsy hands and a little too much beer.) What's a post without before and after pictures? Well, I promise, one is coming soon! I seem to think I've said that before, but I really promise this time!

There is a definite "before and after" project in the works. And who schedules it for the morning of Christmas Eve? Yes, yours truly! You can call me crazy but it IS part of Matt's Christmas present so it's totally worth it.

Matt has been dreaming about a Man Room since the day we started house shopping. About 18 months ago, an outside water spicket leaked and ruined the carpet in "his" room. (And ruined the brand new laminate in the hallway.) I bought new carpet and padding and got a few estimates for the installation. Per the recommendations, we were told to get the hallway floors fixed first because of the transition piece to the carpet. We replaced the hallway laminate a few months later... only to have the ice maker leak and ruin the kitchen floors. Then weeks later, the water heater leaked and ruined the entryway and living room floors.

So... due to other priorities, we never got around to replacing the carpet. It's been sitting, rolled up, in the second bedroom. All of a sudden it hit me last week while racking my brain for gift ideas for Matt. I already had scheduled off on the 23rd and 24th. I made a few quick phone calls and arranged to have the carpet installed on the morning of the 24th. Just two hours after Matt leaves for work!

I'm most excited about getting to repaint the room! (He already guessed that surprise. Boo!) The room was originally a pale yellow when we moved it. It wasn't "manly" enough so Matt chose a dark green. Definitely NOT my favorite. He finally agreed to let me paint it a dark gray. (The color that used to be in our master bedroom that I was in love with.) Yes, technically, I am painting to benefit both of us. But shhhh, he doesn't need to know my motivation!

When the carpet gets installed, I'll update with some pics and Matt's reaction. In the meantime, here are some "before" pics.

Um, not my wreath. It was the seller's:


The existing green paint and old carpet:


Stay tuned for the "Afters"!

Sunday, November 30, 2008

Still Haven't Found the Motivation...

... to get anything done around the house. So instead tonight, I am watching "Nazi Scrapbooks From Hell" on National Geographic. It feels very odd to me, watching the footage. Only three years ago, I visited Auschwitz and Birkenau. There isn't really any accurate description that I can use to describe what I saw. Eerie. Chilling. Evil. None of these words can really capture the inhumanity. However, it's really something that I strongly believe that everyone should see at some point in their life.

"... at Auschwitz is the presence of absence. In other words, you feel the absence of the people who were there." That is very very true.

When you walk into Auschwitz, there are long rooms with glass encasements that run the length of the room. Rooms filled with human hair. Rooms filled with only toothbrushes and hairbrushes, piled waist-high. Rooms with only suitcases. Rooms with mounds of shoes. Seeing this and realizing it was only a tiny tiny fraction of the people that came through there... again, indescribable.


"Arbeit Macht Frei." Work Brings Freedom.


Auschwitz grounds


Execution wall


Guard Tower


Patrolled border


Birkenau Entrance: "Death Gate". The largest of the the Nazi concentration camps.


"In March 1944, the Germans invaded Hungary. Hungarian Jewry underwent in 4 months what had taken 3 years in Poland. The invasion was March of 1944. Ghetto-ization was April and early May.

437,402 Jews were shipped to Auschwitz between the 15th of May and the 8th of July, almost all to Auschwitz. 437,402 Jews on 147 trains in 54 days. The arrival rate at Auschwitz was approximately 8,000 people a day. 80% of whom were killed immediately upon arrival."

-Micheal Brenebaum, Ph.D., Director
Ziering Holocaust Institute


Remains of Crematorium #2


View of brick barracks through barbed wire


View of remains of 300+ wooden barracks

Wow, so I was not intending this to be such a depressing post. Sorry! On a bit of a lighter note, this past summer my uncle told a story of when he was young. The allies had ordered all lights out at night (small town in the Netherlands). He and his brother jimmy-rigged a bicycle tire on the roof to power a light bulb so that they could read at night. :)


Oskar Schindler's Factory Gate


And the purpose of my trip:

Habitat for Humanity


This building process needs its own post. It was so much fun! Hard work, but fun! I went into it blind, not knowing a single member of the 12 person team. It was eye-opening, humbling, somewhat dangerous (for a non-builder like me... ahem. Definitely not OSHA safe!)


Down under (and sunburned) at the Wieliczka Salt Mine. Very cool! I swear! Who though a salt mine could be neat?


Everything was made (carved) from salt, including the chandelier "crystals".


Underground lake and tunnel


In Krakow

Monday, November 17, 2008

Airing my Dirty Laundry

I am so unmotivated with the house reno projects that I've taken to organizing. Pinky promise that I'll show some of those projects soon. In the meantime...

I can’t turn a wooden hanger away:
My closet is the worst use of space ever. It’s big… 10 feet wide. But only 4 of those feet are easily accessible. I bought a double-rod ClosetMaid organizer; I just haven’t installed it yet. (Yeah, that lack of motivation...) If you haven’t figured out that I hate visual clutter by now, here’s Meg at her most obsessive-compulsiveness.

First, get rid of your wire hangers. They aren’t pretty, they get caught on each other, and they put weird stretch marks in your clothes. Buy a bunch of plain plastic hangers. Personally, I like wooden ones.

Then organize by type. I like to separate my collared shirts from my camisoles and Matt’s work shirts from his t-shirts. Then I organize each section by color. Yes, I said color. Stay with me here. I swear it really cuts down on the decision time. When you dress, don’t you base a lot of your decisions on color? What matches or “goes” with the outfit?

This was my brain this morning: I’ve worn black pants nearly every day in the last week. Before anyone thinks I’m wearing the same pair of pants over and over, maybe I should wear gray today. (Scan gray pants, pick a pair.) I think a teal or green sweater would look good with the gray. (Scan green sweater section.) Hmmmmm… I need to layer a shirt underneath. (Scan to the purple camisoles and find one that goes with the style of sweater.)


Containers multiply like gremlins in my house:
I also love drawer organizers. It helps keep my bras separated from my undies and my trouser socks from my gym socks. I spared you from the actual items. I’m sure no one wants to look at that! (And I really don’t want my underwear posted on the internet.)


Even the dirty laundry doesn’t stand a chance:
I hate sorting laundry. Hate it. So having a few hampers in my closet makes me sort as I undress at the end of the day. When I throw a load into the washer in the morning (practically sleepwalking and wondering if I have any non-black pants that are clean), all I have to do is grab the hamper and take it with me to the washer. No sorting required.


Wednesday, November 12, 2008

I'm Betting Only 0.35% Finish Reading This

I've noticed that a portion of my blog hits are actually coming from Google searches, like "How To Hang an Ikea Malma Mirror." I knew I wasn't the only one that couldn't figure that out! lol I'm probably going to lose some of you at this point because this particular post is very specific. So unless you plan on installing Ikea's Tundra laminate flooring soon, you don't need to bore yourself by reading any further. I promise I'll return to the house renovation posts soon. (And probably some more organizational posts too. I can't stop. It's a sickness.)

Now for those of you needing some tips on the installation process of the Tundra flooring, this is for you, especially after that super-duper sale on the flooring from last month!


We choose Ikea's Tundra flooring because overall it’s a great product for the price. Very durable! It wasn’t in my budget to do Pergo. I think Pergo is a slightly superior product (in density and installation) but if you are looking to save money, this is the next best thing! The other products in this price-range looked… cheap. First of all, we had some help in our installation. My brother (a former Lowes flooring manager) and BIL (who does floors for a living) helped us start. If you don’t know someone that’s done this before, don’t worry! Take one of those free laminate flooring classes that Lowes/Home Depot runs. We learned lots from it and got some actual hands-on time in the class.


Tools:

1. The spacer/taping block/metal thing tool kit that Ikea sells.
2. I don’t know much about saws but you’ll need a saw that will cut the boards the long-way and the short-way.
3. A hammer
4. Knee pads like what volleyball players wear. Trust me, your knees will thank you!
5. An old dense paintbrush (to wipe off the dust in the lip before you click and lock)
6. A little hand saw specifically for cutting under door frames


Underlayment:

I don’t think you have to buy Ikea’s brand. You can pick up other brands at a home improvement store. Just don’t buy Ikea’s cardboard-like product. Not good if you have any water issues like we did! Most underlayment is plastic. It’s also usually a moisture-barrier (a MUST if you are installing on a slab) and helps quiet the sound. Check the packaging to make sure about the moisture-barrier. As you lay the sheeting out, you’ll need to tape the seams with special underlayment tape which is available at any home improvement store.


The product itself:
When you buy the flooring, leave it in the boxes. Put it in the room where they will be installed. They need to acclimate in the box in the room for at least 48 hours. If you don’t have central a/c and can install in summer, I’d do it because humidity makes it expand.

Each box has nine boards. While all the boards are the same exact size, they don’t all have the same exact pattern. (Meaning the wood grain look to the board.) If you install them willy-nilly, it looks fine. But it looks fabulous if you install them in the right order because then all the boards look continuous and the seams aren’t as visible. I think there are three patterns. As you open the boxes, you’ll want to separate the each pattern into it’s own pile. Figure out which pattern matches the next pattern. Then install board 1, then 2, then 3, then 1, etc. Hopefully that makes sense! It can get a little tricky because the pattern was a bit puzzling if I remember correctly. It was like 1, 2, 3, 2, 3. It took us a few minutes to figure out something that seemed really simple. lol

Figure out how you want to run the boards. North to south? East to west? Some things to keep in mind… sunlight. Depending on which way you run it, it can make the seams appear more noticeable. i.e. Our boards run north-south. Our sunlight is mainly southern sun so you see the seams a bit more in the light. (Not really noticeable, IMO.) They “say” that I should have installed it east-west. But my hallway, entryway, and galley kitchen all run north-south and it looks much better when the flooring is run in the same direction.


General installation: Lowes/HD can probably tell you much better than I can. But just some things I remember... The spacers are important because the laminate will expand in hot weather. The spacers help accommodate for this. There will be a gap between your baseboards and the flooring. Purchase some quarter-round and attach it to the baseboard after you install the flooring. My suggestion: paint the quarter-round the same color as your trim. I’ve seen it the same color as the flooring and it just doesn’t look as sharp.

The click-and-lock is pretty easy. Before you actually do that part, I use an old paint brush to dust off the lips of the boards because the grit can prevent the boards from being seamless if you don’t. This is the one very apparent downside to Ikea’s quality. It’s almost like there are little jagged cardboard pieces in there sometimes.

Watch Ikea’s online video regarding the actual installation or youtube it (since their video is a bit of a joke with cartoon characters and no sound. lol But you’ll get the picture.) It shows how to start, how to overlap each row’s seams, etc. The first row you lay is easy because you are only clicking them on the sides. The subsequent rows are a bit more tricky because you are clicking them on the top and sides.

Let’s say you are working on row 2:

Lay down the first board in row 2, click-and-locking it to the board above it. Wiggle the board into place at the top. Make sure it’s seamless all the way across. Sometimes you REALLY have to wiggle it and press into it. Once you lay down the board, the seam disappears if you did it right.

Put the next board close to the previous board but give it a tiny bit of space on the left/right side (depending which direction you are going). Push it into place with the board above it. Then take the plastic tapper and lay it on the side of the board. Tap the block with a hammer until it “clicks” into place with the board on the left/right side. Be careful where you place the tapper. There’s a bit of a ledge you need to lay it on. If I wasn’t careful and didn’t put it on the ledge, I’d break the edge of the board. Very frustrating! But once I figured that out, it was smooth sailing! The metal thingy included in the kit comes into play when you get to the edge of a row because the tapper obviously won’t fit between the board and the wall.

Continue this process until finished. And viola! You have a great looking floor for a great price.

Thursday, November 6, 2008

Wine for Lunch?

I've been in need of a lunch bag for quite some time now. I usually use an old plastic grocery bag until it rips and my lunch falls on the ground in the parking lot. But this morning I told myself that it's time for a designated lunch bag. I never have extra plastic bags anymore since I've started using canvas bags for my shopping.

Enter an unused grocery store wine bag.


My grocery store offers a free wine carrier with any wine purchase. The problem? There are six spots and I never buy six bottles at a time. The bag is just a waste... until I started looking at it a bit closer this morning. It's the perfect size for a lunch bag. However, the interior just won't work for my food containers. Unless my lunch is wine, I suppose.


I started ripping one of the interior seams to make a larger space. Viola! And I still have a space for my water bottle and whatever else I plan to carry with me that day. (Today, that's my grocery coupons and ads.) I love when I figure out new uses for old things.

Tuesday, November 4, 2008

Can your house be secure enough?

I've been getting quotes on some home security systems after I had a strange visitor at my door on Sunday afternoon. Let me first explain that I am a somewhat suspicious person. I work for a bank so I am trained to look for security threats, especially physical threats and identity theft. I've also had the unfortunate experience of going through a bank robbery, complete with a gun pointed at my head. It's not a fun thing and it took me a long time to get over. But if anything, that experience gave me the gift to start paying more attention to my surroundings.

I don't usually open the door if I don't recognize the person through the peephole. However, this time I did. Standing there was a teenager. He said he was there to pick up a bag. Having never seen this kid before (or any bag), I was thoroughly confused. I asked what type of bag. He said it was a paper bag, motioning a size slightly smaller than a grocery bag. I asked him when and where it was left. He said the bag was left on the front porch last week. I kept repeating that I didn't know what he was talking about. He shrugged his shoulders and left. I watched him jog off to his friend that was standing in the street. They walked away, not stopping at any other houses.

Was it drugs and they had me confused with another house? Were they casing the place? Were they checking to see if anyone was home before breaking in? There was a residential burglary one block down last week. I've been wanting to get a home security system but this just helped me get on the ball. I started making calls. I also started talking to the neighbors, seeing if they have noticed anything suspicious.

Well... I found out the deal with the kid. My neighbor said the bag was for a church food drive! lol She received her bag last week, filled it up with canned goods, set it on her porch, and saw a boy (fitting the same description) pick up the bag Sunday afternoon. Whoops! Couldn't he have just said that?! But I'm not changing my mind about the security system.

I have been getting some quotes/assessments from three different security companies. During the house assessments I discovered that I've been doing a lot of things right. Here are some tips to make your house less of a target:

1. Keep exterior areas well-lit and trim down any overgrown shrubs. I keep my porch light on dusk to dawn. I will be replacing the side and back lights with motion detector lights. Always have an interior light on at night. I keep a living room light on a timer.

2. Deadbolts. Seems obvious but I was really surprised when I knocked on my neighbors' doors. Some didn't have deadbolts and others had pretty flimsy locks. A police course taught me that the screws for the plate into the door frame should be at least 2 1/2 inches long. It makes it much more difficult for the door to be kicked in.

3. Use double cylinder deadbolts on doors with glass. Two of my doors are half glass. If I had a regular deadbolt, all you would have to do is break a small pane of glass, reach in, and unlock the door. Do yourself a favor and use the deadbolts that need a key on both sides to prevent this. (To avoid a fire hazard, keep the key nearby... just not within reach from the door.)

4. Keep your curtains closed when you are not home. Don't give potential burglars a chance to look in your windows, looking for items to steal. I am most adamant about this when I am at work and a little more lax when I step out for a quick errand.

5. Consider a monitored security system. My homeowners insurance offers a 15% discount if you have one. Not bad!

6. If you are on vacation, stop your newspaper and have the post office hold your mail. (Both are simple and common requests.) Keep lights and tv's on timers. Make sure your lawn is mowed or driveway is shoveled.

With the holidays coming and the economy in it's current state, banks know that identity theft, burglaries, and bank robberies become much more prevalent. Be aware of your surroundings and keep safe!

Friday, October 31, 2008

Sometimes the Creativity Bug Bites Me

... but most times not. Although, every once in a while I come up with a clever fix for the inconveniences in my house.

Both of my problems are related to electrical. I can change out a light switch or electrical outlet, but I don’t tackle anything more than that. I needed a cheap fix that didn’t require an electrician.

Case in point: my living room has no light switches. Sure, I could just turn on the lamps with the switch on the cord. But it was a hassle because the “on/off” was actually located behind the entertainment center. Plus, there are two of them to deal with.


The other lamp is on a timer. Just to distract you for a moment... isn't the capiz lamp gorgeous? Originally $60 but snagged for $11 on clearance.


Rather than spend the money on hiring an electrician, I bought a $15 receiver that plugs into the electrical socket. I plug the lamps into the receiver and an itty bitty remote controls the lights.


Pretty nifty, eh? Kind of like "The Clapper” but not so 1984.

The remote isn’t your only option. It also comes in a remote light switch. It looks like a regular light switch plate. But it’s not. You just screw it anywhere into the wall. Viola!


Next up was my mudroom, which only has one light switch. It is a small room that is sandwiched between the garage door and the kitchen door. Since there is only 7 feet to cross between the doors, why should you even need to turn on a light? It could have something to do with the 14 pairs of shoes strewn about. I would love to able to turn on the light when I enter the room, cross the tornado of shoes, exit the garage door, and turn off the light behind me. My failed solution: a nightlight. No amount of light was enough to see in that pitch-black room. My next solution: a motion-detector light switch!


The sensor coverage is 150 degrees. Not bad! It also detects motion up to 30 feet away. That’s not all, folks! It will automatically turn off after your desired amount of time of inactivity. We set it at 1 minute to save electricity. (After all, when I'm in the room, I'm usually moving.) It also has a customizable sensor so that the light will not turn on if it detects enough daylight. The mudroom has a window and a door with glass inserts. It’s bright during the day but just too dark at night. For $15, I don’t have to worry about twisting my ankle anymore. Worth it to me.

Tuesday, October 28, 2008

I'm an organizing dork

I'll admit it. I love organization. I love organized organization. My heart goes pitter-patter in the storage section of Ikea and Target. I stay away from Container Store because I know what's good for me. I organize on a budget so I won't even tease myself by going in there.

But quite honestly, I have to be organized. My house is on the smaller side (1250 sf) which is perfect for the two of us, a cat, and a little one if the time comes. My house doesn't feel small and I think it's due to my lack of "stuff".

Here are some things I've learned throughout the years:

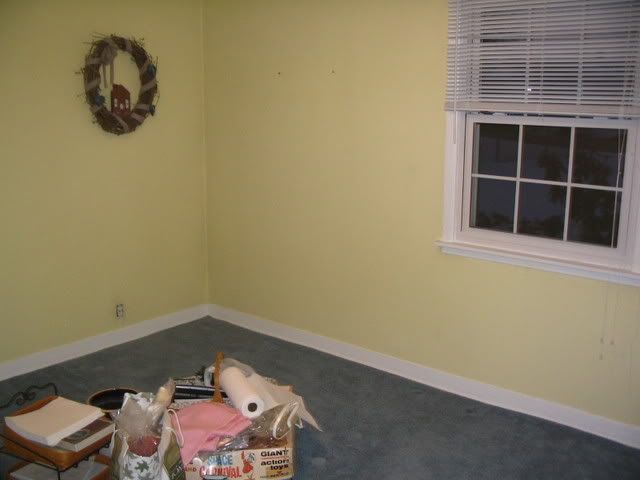
1. You can't organize junk. Get rid of the items you don't use. Show no mercy. If you think, "I might need this" or "I could fix this" just Get. Rid. Of. It. Every once in a while I come across items that I wonder why I put it away, like a broken camera. I planned on getting it repaired... but instead bought 2 additional (and better) cameras since. Or I find items like VHS tapes when I no longer own a VCR. Cassette tapes. Ahem, Spice Girls.

Don't kid yourself that you'll sell it on Craigslist or eBay. Have a garage sale. (Personally, I skip that step.) Whatever doesn't sell, immediately put in your trunk and take to Goodwill. Except those old cell phones! Donate them to your local women's shelter.

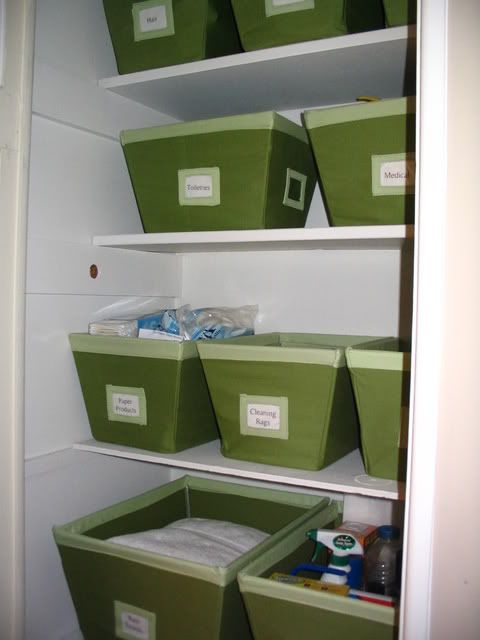
2. Don't buy organization containers without analyzing what you need. After de-junking, look at what items you need to organize and buy the containers that fit those needs. Don't do this step until you finished with step 1. Measure your closet shelves (width/depth and height) and buy containers that make the most of the space.

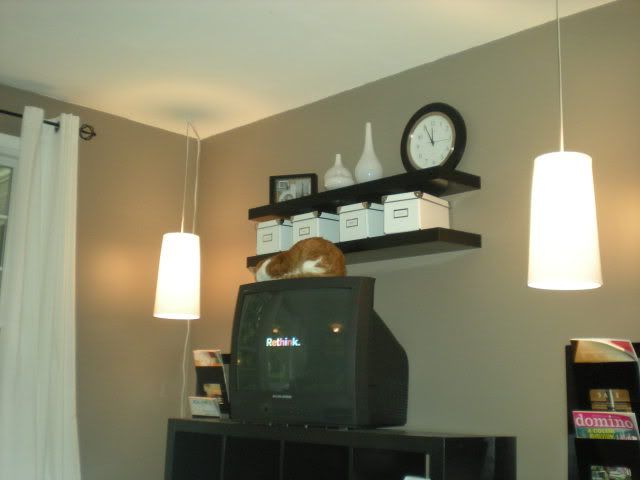
3. You don't need uber-expensive containers to organize. Check the Dollar Store, Target, or WalMart. I found matching canvas totes on clearance at Lowes after Christmas. Ikea has some cardboard containers that don't look very cardboard-ish. I have them hanging out in my living room, organizing everything from dvds to frequently used tools and small electronics.


4. Be creative when it comes to containers. 
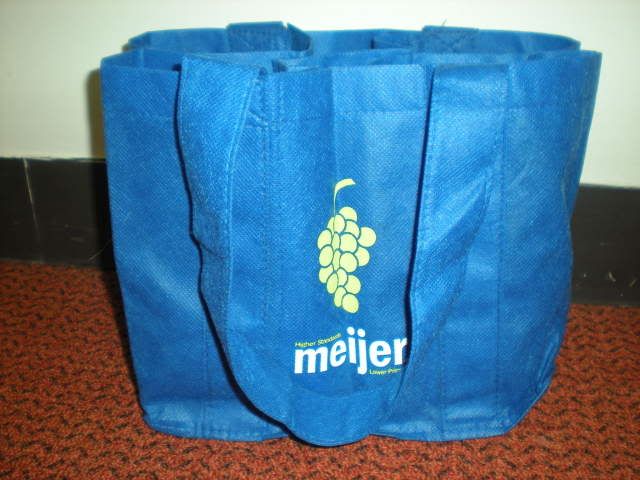
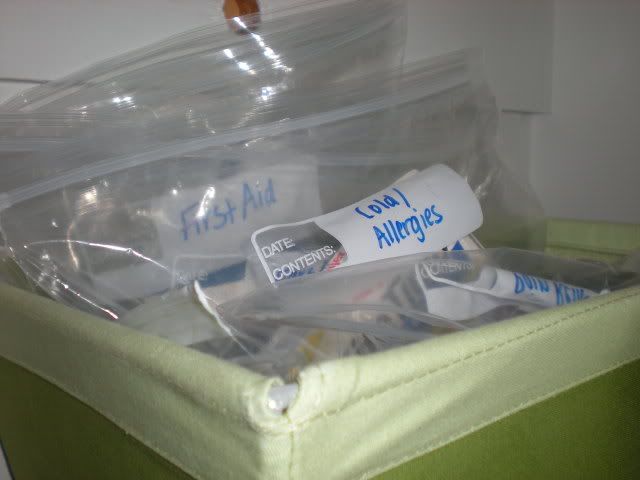
My favorite trick: plastic zip lock bags and a Sharpie. My medicine cabinet doesn't store medicine. That's what happens when you are a make-up junkie and Sephora is your kryptonite. The cute little plastic drawers don't really fit my needs (but they may fit yours) so I stick it in a canvas tote, organized by bags so I can easily find what I'm looking for.


5. One word: Clear containers. (Ok, that's two.) It makes finding things a lot easier. I use clear containers behind closed doors. I don't like the visual clutter of clear storage but that's just me.


6. Label. Label. Label. Even with clear containers. It doesn't have to be anything special or printed. I like my labels uniform because it gives me secret pleasure. I know, I'm weird like that.


7. Hooks are your friend. I don't have a place to store my jewelry so some hooks behind my bedroom door are perfect for this. I also have a couple hooks on the wall for my robe and hoodies that would otherwise end up on the floor or thrown over a door.


8. Use dual purpose furniture. My entertainment center also stores blankets, magazines, and other various items. What about a coffee table that has storage? Use under-the-bed containers for off-season clothing. Create even more space under your bed by using bed risers. Use those same containers under your couch if you can. I store extra blankets under mine.

9. Think vertical. If you've run out of room, think up. One of my fav fav fav products is Ikea's Lack shelf. I have a couple but I've seen pics of walls with 5 of them lined up. The result is modern and clean. (Don't mind my cat and his new napping spot.)


10. Organize in a way that fits your lifestyle. I have trouble with paper clutter. I signed up for as many e-bills that I could. I adapted the tip of going through my mail as the first thing I do when I enter the house. Junk mail goes straight in the recycling bin. But the stuff that needs to be shredded? Not so easy since the shredder is located in the spare bedroom. I since moved it to the mudroom and I take care of those items when I enter the house.

After writing this entry, I just discovered this great blog: The Unclutterer. There are some really helpful hints and organizing ideas. Any tips that you use and are willing to share?

Sunday, October 26, 2008

Battle of who is Smarter: Meg or the Mirror

The contenders:

Ikea Malma mirrors:


Meg:


I just bought 12 of these mirrors for my entryway. I already have a mirror in my entryway but it just doesn't look finished.


In addition, when the front door is opened, it hits one of the sconces and keeps marring the freshly painted door. So I bought these iron scroll-y things for $3 each on clearance at Target. Blech.


I thought that adding a frame around the mirror would snaz it up. Until I put this ginormous 6 foot thing in my living room.


It's only a few feet away from the entryway. I think two big mirrors make me look a little vain. But in all honesty, it's a decor trick to bounce some light in this dark area. $36 is a lot cheaper than a new front door with some glass inserts. (That will come. Just not in the budget right now.)

But sadly, these Malma mirrors have been sitting on the floor for 3 weeks now because I couldn't figure out how to hang them. Like in traditional Ikea style, there weren't any instructions. (I would have even settled for their picture-only instructions.) Google wasn't helping except to reassure me that I'm not the only one in this quandary.


There were two small hooks and a short piece of string included. Huh? I finally realized you need to screw the hooks into the back and run the string through the hooks a few times. But if I screwed them into the back, the mirror won't lay flush on the wall. Now, I love me a tilted mirror ( a common restaurant decor trick.) But it wouldn't look right with two rows of tilted mirrors.


On top of that, I'd have to screw in 24 of these hooks. (Did I mention I'm lazy?) There were no pre-drilled holes. I'm not that ambitious. But necessity (or laziness) is the mother of invention. I found these 3M picture hanging strips from their Command Adhesive line.


What do you think?


I may add some hooks for coats underneath the mirrors at a later time. Not necessarily for my coats (because it's visual clutter to me and my OCD tendencies). But while I have 2(!) hall closets across from these mirrors, they are currently serving as storage. Not something I'd want my guests to see.