Thursday, June 25, 2009

57 bags of top soil, 7 gallons of paint, and an aching back.

Before:


(The deceiving picture from the online listing that I mentioned earlier.)

This is what we saw in our walk-through:


This is what we were working with come spring/summer:


Overgrown shrubs, dead grass, a sad faded yellow paint color, and a floral mailbox. It was depressing. But now, not so much. :)


Please ignore the big blue tub. It houses all the river rock that I'm still pulling up and eventually delivering to my friend's fire pit. There is still a lot to do: scrape and paint trim, fill in the bare areas, finish transplanting the rest of the hosta to the side of the house, new edging... The list is never-ending.

As an overeager homeowner, I:

1. Painted. Yep, the ENTIRE house, by MYSELF. Olympic's Stone Grey for the house color and Phantom Mist for the shutters. It looks black on the paint chip but is a wonderfully rich espresso brown. All for about $150. Yes, you heard that right. $150!

2. Ripped out the shrubs. With the help of a generous friend. Who am I kidding? I didn't "help"at at. She was wielding that ax just fine. If it was left for me to do, those shrubs might still be there today. (I'm paying her back in the form of river rock.)


3. Dug up a ton, literally, of river rock. Replaced with black mulch.

4. Slowly added new plants. Last summer, I was about 25%.


I think I'm about 50% this summer. Hopefully next year, I'll find exactly what I need to fill in the rest of the area.


5. Decorated with some hanging baskets. My $5 Boston ferns and $5 hanging baskets from WalMart. $40 for all of this. Can you believe it?


Another quick before and after:


6. My favorite part was fixing that grass for under a hundred bucks. 57 bags of top soil, fertilizer, and a bag of grass seed later:



7. I was glad once we got rid of the ugly mailbox. We had a little giggle when Matt pulled it out of the ground. We replaced it with a basic black house-mounted one. (One that I hung a bit too tall. I don't think my mail carrier can close it. I didn't think about the fact not everyone is 5'9". lol)


8. You can't see the house numbers because I removed them from the pics, but they are of the floating numbers sort. Similar to:


I think that's about it. lol This totally inspired me to break out the "listing" pics of the house and compare them to the "now" pics. Look for more blog posts to come!

The Eerie Similarities of...

Online dating and online house hunting:

Many of our friends know that Matt and I met on a online dating website. At the time, I just finished with school and was incredibly shy. (I've now done a complete 180 thanks to my job!) I had a really hard time meeting people and online made it very easy. It was like window shopping for a man. lol It was mostly entertainment and not anything I took seriously. Until I met Matt. :)

However, online dating taught me a few things:

1. Pictures can be deceiving. Just a headshot may be hiding his special wolf t-shirt.

2. Profiles can be deceiving. "I like to kick back and enjoy myself" translates to "I drink beer until I'm stupid and puking everywhere. Then you can clean it up."

3. Go with your gut. If you have a bad feeling, your instincts are kicking in for a reason.

4. Give people a chance. On paper, someone may not seem to be your type but you may be surprised once you get to know them.

When we started house hunting online, I was amazed at the similarities it had with online dating.

1. Deceiving pictures? Check! Isn't it amazing how awful neighboring houses are carefully cropped out of pictures? Rooms can look beautiful online... only to discover the work is shoddy and a bit scary.

2. Deceiving descriptions? Check! "Cute little dollhouse" means that only DOLLS will fit inside the house.

3. Go with your gut. There were a few houses that we didn't spend more than 15 seconds in. I just had a baaaaaad feeling. Like the one that smelled a bit funny. A bit funny like they were hiding a huge water/mold problem.

4. Don't prejudice yourself. The house we ended up buying? I almost refused to look at. lol I'm glad that Matt convinced me. I had a gazillion reasons why I didn't want to, but the second I walked through the door, I just knew. It had good bones. It felt like "home". And the cosmetic work it needed? Not an iota of a deterrent.

Stay tuned for some of those deceiving pictures, the "real" pictures of the walk-through, and some "afters"!

Saturday, May 16, 2009

Guess what? MORE Drawer Organizing!!

This time, I'll show you my other addiction. (That is, the one besides organizing.) It's makeup. I'm a makeup whore. I don't wear a lot on a daily basis but I like having options and I like to play around with it.

Having so much of it, though, slows me down in the mornings because I can't find what I'm looking for. A small container with plastic drawers is what works for me. I picked it up at Target or WalMart for about $5. It's about 6" x 7" x 8".

I organize the drawers in order of how I apply my makeup. Concealer, foundation, powders, and primers in the first drawer. By the way, those little sample containers that you get at Sephora are GREAT for repurposing. I use Dr. Brandt's Pores No More (amazing stuff!!) on a daily basis and touch up late afternoon. The stuff is so expensive that I won't buy two tubes. I keep the original container in my purse and this little pot at home. (Not vice versa because I don't want to be dipping dirty fingers in the pot and contaminating the product. I can be assured I have clean hands at home. A little harder at work.)


The next drawer stores my eyeshadows. They are small pots so I used a leftover container that fits perfectly in the drawer. You could probably also use a shelf liner to prevent the sliding around. What I hate about Bare Escentuals is that you can't tell what color you are grabbing. If you store them upside down, viola! Unfortunately, if you do that, the loose powder will fall through the sifter and make a mess. My solution is to not remove the inside sticker after you purchase the product. Take something sharp (and sterilized) and poke a couple holes through the sticker. Only a small amount will now come through the sifter.


The final drawer stores the items that I apply last.


I used to store my brushes in the appropriate drawers until my collection started growing a little too much. I had to find an alternative. I really like my brush roll from Sonia Kashuk. I bought mine at Target on clearance for about $7. They still have it in other patterns for about $12.00. This is essential if you have a lot of brushes.


If you only have a few, this piece is good for organizing your makeup and brushes. It's pretty efficient if you don't have a huge arsenal.


I swear I don't wear ALL that makeup on a daily basis. In fact, I went to the MAC counter today for some new eyeshadows. I asked for a "day" look. I ended up with what I consider an "evening" look. lol

Monday, May 4, 2009

The first step is admitting you have a problem, right?

I've been cooped up in the house for the last eight days thanks to an injured foot and acute bronchitis. Unfortunately, waiting for prescriptions to be filled at WalMart leaves me in a very precarious position. This means I have to wander the store for 30-45 minutes. I don't even want to guess what will happen when I transfer my prescriptions to Target. lol

As I was waiting, some little drawer containers were calling my name. At $2.27-$2.37 each, how could I resist? My existing containers weren't working out so great. See here? Where the chopsticks kept poking out? The drawer is already fairly organized but it still bugged me. The containers slid around too.


Keeping in mind three important organizing ideas, I got to work:

1. Purge, purge, purge. Get rid of those items you don't use.
2. Keep like-with-like.
3. Everything has a place. (I think I've said that before but it's so important that it needs repeating.)

Now, these little babies hook onto each other and prevent the slide-around. Looks a little better, don'tcha think?


It even worked for my food storage containers. The Ziplock bags to store the lids was such a great idea... until Matt told me that he doesn't like using it because there's still water on the lids when he takes them out of the dishwasher. (I couldn't argue that he should just dry it off since he does ALL the dishes! lol)


And with the three extra organizers that I bought "just in case":

Friday, March 27, 2009

Say what? "No Soliciting" Signs are Tacky?

Apparently some people think this. Apparently these people don't get solicitors at their doors! lol I just picked up a small sticker that fits in my screen door. But it must be minuscule (or invisible) because my door bell continues to ring.

After the following conversation, I decided to make my own sign.

Ding! Dong!
Me: Yes?
Solicitor: I'd like to show you my cleaning products and get your opinion.
Me: (pointing to sign) Isn't that soliciting?
Solicitor: No, I don't consider it to be soliciting.
Me: Well, I do.
Solicitor: No, I don't think it is.
Me: Can I buy your products if I'm impressed with them?
Solicitor: Yes.
Me: (closes door)

My new sign:


No Soliciting

Solicitation so·lic'i·ta'tion n. [suh-lis-i-tey-shuhn]
1. To petition persistently; importune: solicited the neighbors for donations.
2. This means selling something.
3. Requesting donations.
4. Advertising
5. Surveys
6. Viewing my phone bill to see where you can save me money.
7. Saving my soul.
8. And yes, YOU too. If you don't know my first name, then don't ring my doorbell. TIA!


I'm taking votes on how long it will be before my house gets egged. By the way, for those of you in need of a nice unobtrusive sign, I found these.

Sunday, March 22, 2009

The Final Reveal

I know I promised this months ago! But what can I say? Life happens. :)

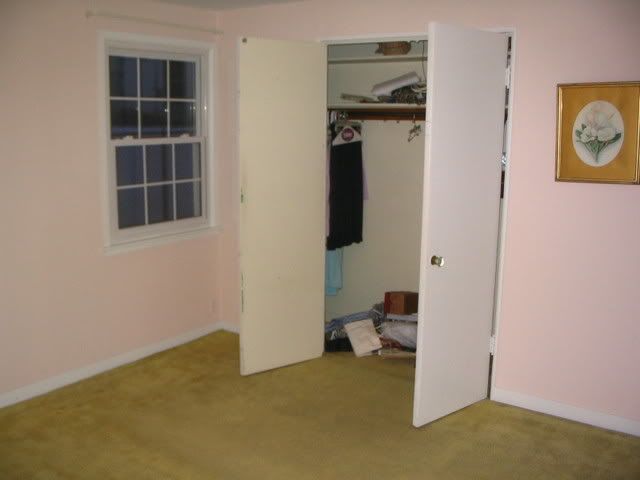
Here is what I was blessed with when we bought the house:


First things first: new paint, carpet, and light fixture.


Life was hunky-dory. Until we got a great deal on a king mattress and a new bedroom set. The new bedroom set is a warm cherry color, which looked awful with the gray walls. I wasn't ready to give up the gray yet so I moved that color to the Man Room. Then I was off to find a new paint color that would complement the furniture and carpet. It turns out that those two items are mutually exclusive.


Eventually I decided on Sherwin William's Kilim beige. After a couple months, I HATED it. Well, hated it with the carpet. Other than that, it's a good color so I moved it to the hallway.

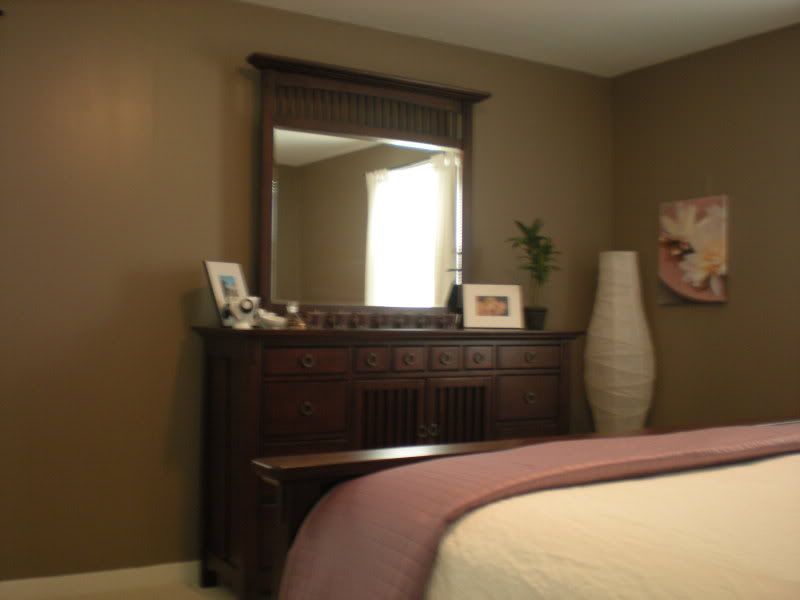
And the new color I chose? Ralph Lauren's Natural Gray. The same color that is in my living room.

A quick reminder of the before:


And now the After... Tada!


(Inspiration for earring organization from Making it Lovely.)


I was ready to give up the plum accents, thinking it wouldn't work with the wall color or furniture. (It didn't look so hot with the beige wall color.) But it turns out I was wrong! Yea!

Project Cost Breakdown:
Paint: $26
Carpet: $216
Installation: $75 (family friend)
Ceiling light: $40
Light switches and electrical outlets: $15
Duvet: $80
Sheet set: $60 (originally $180)
Quilt: $35 (originally $70)
Curtains and rods: $72
Wall decor: $70
Knickknacks: $20 (All bought on clearance.)
Total cost: $709

I know I didn't include the cost of the new mattress and furniture but I strongly believe you can make over a room without purchasing new everything.

Still left to do: buy lamps for the nightstands, actual artwork for above the bed, a classier alarm clock, replace the recycled curtains, and a couple more decor items. Maybe some more exciting sheets. But for the most part, it is done! Done! What do you think?

Wednesday, March 11, 2009

Ahem! (tap tap) Is this thing on?

I'm back from my hiatus. I know it's been a while. I wasn't in the house-renovation mood for a while. Then I found some more interesting things to take care of...

Introducing Linus and Lucy:


The night we adopted them, we had no intentions of bringing home a cat, much less two! We only went to get information on the adoption process. But Matt and I came across these two 6 month old kittens and couldn't say no. The two littermates were found in a local warehouse. They were starving and underweight. The foster mom, Rose, was at the shelter so it was great that we had the chance to ask a lot of questions about their personalities and needs.

I completed the adoption paperwork that asked the standard questions like:

1. How long will you give the adjustment process? (Duh! As long as it takes!)
2. Do you have any current pets?
3. If not, what happened to them?
4. Can we contact your vet for references?

I just answered very vaguely that I had a cat that was recently put to sleep. I didn't mention Fatty by name. The vet was xx Animal Hospital. The foster mom was reviewing the paperwork and looked up to ask, "Was Fatty yours?" I just looked at her bewildered, wondering how she knew. She said she works at that vet and knew about Fatty. I knew then that these two kittens were meant to be.


However, I really do have some house updates. Whoohoo! I finally got a paint color picked out for the master bedroom. (And painted!) I bought some new bedding and spray painted a bunch of decor. I was really happy I was able to reuse some of the previous decor. Initially, I didn't think the plum and lavender would work with the new furniture.

So here is a taste of what's to come:


I need to clean the bedroom of cat toys and clutter before taking more pictures. Then I'll give a full before/after update. I'm so excited. This room has done a complete turn-around, if you'll remember:


Scary stuff!!